

Be warned that this is a messy project so be sure to protect whatever surface you'll be working on. It takes a good long afternoon to finish, or you can do it over the course of a few days to allow ample drying time in between paint/glue/mod podge coats.


First we need to start with what supplies you'll be needing:

- Hammer
- Awl
- FLAT head Tacks & Magnets (super strong ones recommended)
- Sharpie
- Jar Lids
- Paper rounds (cut from tracing the jar lip onto pretty paper)
- Paint brushes
- Paint (I used regular craft paint)
- Mod Podge or other sealant
- Paper Towels and a cup with water to rinse the brushes
*You'll also need scissors and a pencil to trace your paper rounds.

If you're going to be making tacks then start off by making the hole in your lid with an awl and hammer. Then you apply a dab of glue to the inside of the lid and push the tack through and set aside to dry thoroughly.

Paint your lids. It will take at least 3 coats for good coverage. At first it looks like the paint will not stick but after you allow the first coats to dry the subsequent coats stick better.

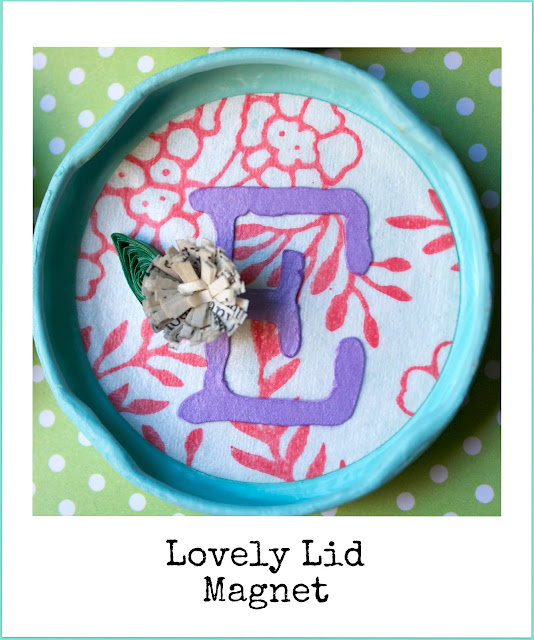
Once your lids are totally dry you'll add the paper inserts you cut from tracing the lid of your jars. If you're going to add letters or embellishments, do so BEFORE you glue them into the lids. For the letters I cut some from my favorite font using my digital cutter. But you can also print out your favorite letters in a huge font and then cut them out and trace them onto your desired pretty paper and cut those out.
Add your insert and Mod Podge the junk out of it. I mean that! Slap it on like if you're in kindergarten and then let it dry. The Mod Podge layer protects the paint from chipping and also coats the paper embellishment inside which helps prevent it from fading.

I also embellished mine with some quilling (of course) but you can really use anything you like. Add bling, use paper punches to add interest, it's really up to you. You're only limited by your imagination.
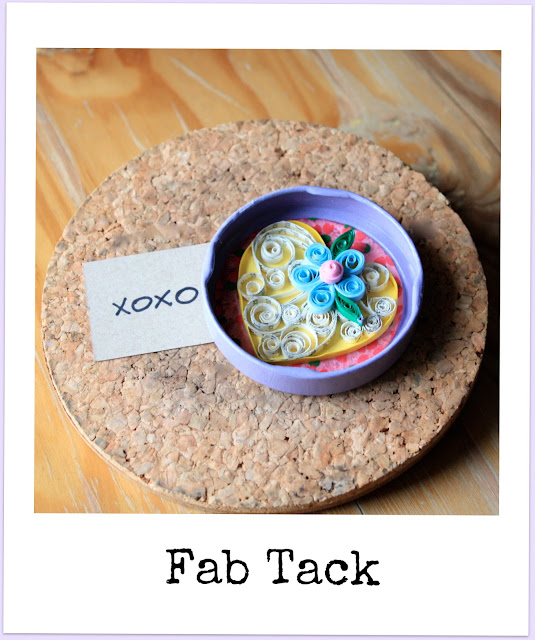

I used strips of book pages to make swirls inside the heart shape.
If you're making magnets then you just glue the magnet to the center back of
the lid after it is all dried and done. Easy peasy!

So pretty, right!?
Let me know if you decide to try it out.
Hope you love the tute.
Stay SWEET!

woah, woah, woah! these are SO CUTE!!! :) Thanks for the great diy! I wil have to try this sometime soon!!! Just have to collect lids :P
ReplyDeletewow there awesome, love the quilling, and colors, great idea !!!!
ReplyDeletePaula
Oh I have to try these out!!!thanks Sandy:-)
ReplyDelete& ur quilling is amazing too!!!
http://divya-art-room.blogspot.com/
Great idea and lovely design
ReplyDeleteThis is a superb idea and really not-too-difficult. Cheers!
ReplyDelete