I've also always wanted to include a brief synopsis of quilling along with my cards but by the time I'm done making it and creating the matching envelope I feel too impatient and just want to send it out. The thought of printing out a separate note to include with the card explaining the process of quilling seems too daunting and messy. (Find the perfect paper, create the document, make sure it prints well... forget it.)
Well, have I got good news for you! My friend Linda at "My Quilling Nest" has created a stamp set AND an awesome 3D envelope to solve my (and your) dilemmas.
The stamp set, appropriately titled "Quilled with Love Stamp Set" comes with 11 (yes, ELEVEN) stamps that we can use for any quilling project. The stamps come together in a large square and they are to be cut and mounted on clear plastic blocks (by you).
My favorite stamp is the one that explains quilling because it's definitely something I've been wanting to include with my cards for a while.
Here I used it on a tag to include with a set of cards that was ordered. I do my best to create unique and pretty wrapping for all my orders because I want my customers to always feel special, like if they're getting a gift in the mail. The fringed flower is also a magnet ;)
Another way they can be used is on the back of a card, at the bottom. Sort of like your own "Hallmark" seal. There are tons of options in the set you can use including one for paper roses, fringed flowers, husking, and even jewelry.
But, she didn't stop there! She went ahead and also created an envelope that will solve our other dilemma ... shipping. I usually send my cards out in rigid mailers. But, they're not really that pretty. This envelope is 4.5 by 6 by .25 inches and accommodates cards with up to 1/4 inch of height on them. I'd use the card as a mailer but I can see it being used as an envelope too, with some embellishment.
Here is the envelope, it comes pre-scored and with instructions (she thought of everything). And ahesive to make folding SUPER easy:
Here is Used the stamp that says " A quilled gift for you!, From... Quilled By... Date..."
For more info on these two products (which Linda so lovingly provided to me for review) visit Linda's blog here. Her official announcement is today and I'm sure you all want to get your hands on these fab goodies.
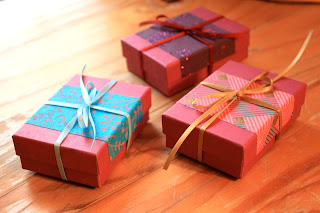
And, since we are on the topic of packaging, let me share some boxes I created for some rings that were ordered. Who needs the calendar to tell you when you should send a gift? Every day is a special occasion!!
A SWEET weekend to you all!


really awsome, thanks for sharing,love it!!!!
ReplyDeletePaula
great idea to use the boxalope like a gift box! love it and the owl card you made is amazing!! and the magnet on the gift tag great! thanks for all the tips!
ReplyDeleteAwesome!! I just love your owl!! The gift tags and wrapping ideas.. LOVE them!!! Thanks for sharing
ReplyDeleteHugs,
Tanya
Linda's boxelope is perfect for protecting embellished cards...the stamps are perfect for projects also. Love your projects...the magnet, owl and packaging are sweet. Nice blog :D
ReplyDeletequilt 4 fun 2 at hot mail dot com
Lovely work Sandy like always. I love that Owl! what a hoot...hehehe..Thank you so much for doing this I truly appreciate it.
ReplyDeleteQuilled Hugs,
Linda K.
Lovle your creativity and Linda's new products
ReplyDeleteI love your card and the boxelopes are fantastic.
ReplyDeleteThe coloured owl is so lovely! I love the box envelopes idea! Thanks a lot for sharing! And I agree that every day is the perfect day to send a gift:)
ReplyDeleteBrilliant ideas, all around!
ReplyDeletelove the owl card, very cute!! Love the boxelopes and the quilling stamps!
ReplyDeleteI just LOVE that cute owl !!
ReplyDeleteso lovely.
ReplyDeletemy blog-follow me♥mfashionfreak
Thank you all for your kind comments. I hope Linda has great success in her new ventures!
ReplyDeleteThis creativity is awesome i can say that the artist is so talented .
ReplyDeletediscount card printing
printed gift cards